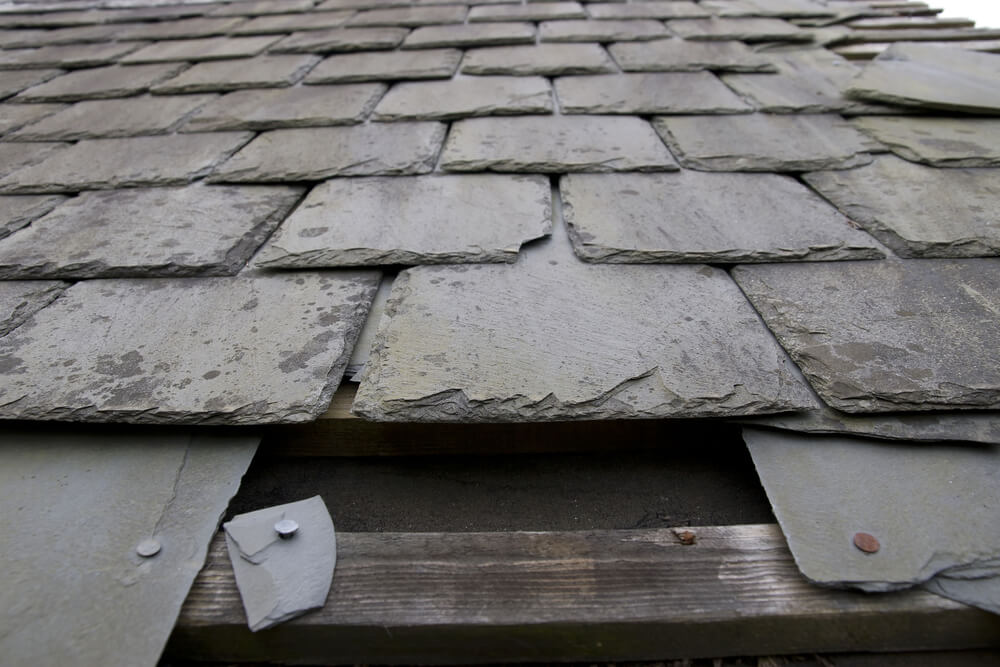
Roof shingles are not impervious to damage. Environmental factors such as high winds, hail, and excessive sun exposure can lead to shingle deterioration over time.
One of the most common roofing issues homeowners face is blown-off roof shingles. This situation often occurs after severe weather events, leaving the roof vulnerable to further damage.
Necessary Items for Repairing Blown-Off Roof Shingles
Repairing or replacing blown-off roof shingles may seem like a daunting task, especially for those unfamiliar with the process. However, it is an essential skill for homeowners to have.
Before you set foot on your roof to assess the damage, you will need to gather some essential tools and materials to ensure you can adequately carry out your roof shingle repair.
These items are not just essential for performing the repair but also aid in ensuring your safety while on the roof.
The first item you will need is a pry bar or a nail puller. This tool is critical in removing the damaged or blown-off shingles from your roof. They are designed to pry nails and fasteners loose without causing further damage to the surrounding shingles.
Next, we have the ever-reliable hammer. A hammer is used for driving the nails into the new shingles you will be installing. Look for a high-quality hammer with a magnetic nail holder which can hold the nail in place while you hammer it in, reducing the risk of injury.
A utility knife is another invaluable tool for this task. This comes in handy when you need to trim the new shingles to fit into your roof’s existing pattern. Be sure to handle the knife with care to prevent any accidents.
In addition to these tools, you will also need galvanized roofing nails. These nails are resistant to rust and corrosion, making them ideal for securing your shingles against harsh weather conditions. Ensure that you have enough nails to secure the shingles properly; having too few may result in loose shingles that can easily be blown off by strong winds.
Of course, you’ll need a ladder to get onto your roof. Make sure to set it up on solid, even ground, and if possible, have someone hold the ladder while you’re climbing to enhance your safety.
Lastly, you will need matching shingles to replace the ones that have been damaged or blown off. When purchasing new shingles, make sure they are of the same type and color as your existing ones to maintain a uniform look. Depending on the extent of the damage, it might be a good idea to have some extra shingles on hand for any unexpected repairs in the future.
Acquiring these necessary items for repairing blown-off roof shingles is the first step in ensuring a successful roof repair job.
Steps for Replacing a Shingle
Here is a step-by-step guide on how to replace a roof shingle:
1. Step one involves the removal of the damaged shingle. Using your pry bar or nail puller, carefully slide it under the damaged shingle to loosen it. Apply a bit of pressure to lift the shingle gently, allowing you to identify and remove the roofing nails.
Be sure to do this with caution to avoid damaging the surrounding shingles. Depending on how severely the shingle is damaged, it may come off in pieces. Ensure you remove all shards to make room for the new shingle.
2. Once you’ve successfully removed the bad shingle, the next step is to prepare and install the new one. Utilize your utility knife to cut the new shingle, ensuring it matches the size of the removed one. When the new shingle is ready, slide it into the vacant spot.
3. When the new shingle is perfectly in place, the next step is to secure it using the galvanized roofing nails. Start from one end of the shingle and drive nails through its corners. Keep the nails as close to the corners as possible to ensure the shingle is secured uniformly. Nail the new shingle until it’s firm and sits flush with the surrounding shingles.
4. While nailing the new shingle, you might have removed some nails from the surrounding shingles. Now is the time to return these. Carefully replace any nails taken out from neighboring shingles during the removal of the damaged one.
5. Just as a final note, always remember to dispose of the old shingle responsibly. This might seem like a minor detail but disposing of old shingles is an important part of maintaining a clean and safe working environment.
Safety Precautions for Roof Shingle Repair
As crucial as roof repairs may be, safety should never be compromised. Working on the roof presents a unique set of dangers that need to be addressed thoroughly before any repair work begins. Here, we’ll cover the most vital precautions to take when repairing roof shingles.
Sturdy, non-slip boots provide the necessary grip to keep you firmly on your feet, and gloves help in handling tools and shingles without injuring your hands.
Next, ladder safety is another crucial component in roof repair safety. Always ensure your ladder is stable. Avoid placing it on soft, uneven, or slippery surfaces. The ladder should extend at least three feet above the rooftop to provide a secure handhold when stepping onto and off the roof. Always maintain three points of contact (two hands and a foot or two feet and a hand) when climbing or descending the ladder.
Weather awareness is a factor that may not always be top of mind but is no less critical. Never attempt roof repairs in windy, rainy, or snowy conditions. These conditions can make the roof slippery and thus, dangerous. Even the morning dew can create a slippery surface, so it’s best to allow the roof to dry before beginning.
While these precautions might seem extensive, it is essential to understand that working on a roof without adequate safety measures can lead to severe or even fatal accidents. In addition to these, always keep your work area clean and organized to reduce the risk of tripping or stepping on sharp objects.
Lastly, it’s important to note that if at any point the repair work feels too overwhelming or dangerous, it’s best to step back and hire a professional.
Roof repair is not something to tackle lightly; it requires knowledge, experience, and a certain level of physical fitness.
Safety should always be your priority, so if you’re unsure about anything, don’t hesitate to consult a professional roofer. Your safety is worth more than any savings from a DIY repair job.
Consider Upgrading to Superior Roofing Materials
While repairing your blown-off roof shingles is crucial, you should also consider the long-term benefits of upgrading to superior roofing materials.

Roofing materials have remarkably evolved over the years, with manufacturers now offering a wide range of robust and durable options.
The choice of material should, of course, be influenced by the home’s geographical location, climate, and aesthetic requirements. Some might prefer the rustic charm of wood shingles, while others might opt for the sleek appearance of slate or the durability of metal.
Regardless of the option chosen, an upgrade to a superior roofing material can provide enhanced protection against the elements. High-quality roofing materials are more resistant to weather damage, require less maintenance, and can better withstand wear and tear, thus extending the lifespan of your roof.
When it comes to resale value, a superior roof can significantly impact a home’s market price. Prospective homebuyers value a well-maintained, durable roof as it indicates a long-term investment, thus reducing the need for immediate replacements or repairs.
According to real estate experts, a new roof can add up to $12,000 to the sale price of a home. Therefore, an upgrade to superior roofing material can be a profitable venture in the long run.
However, it’s not just about protection and resale value. Superior roofing materials can also offer an aesthetic boost to your home. With a variety of textures, colors, and designs, these materials can enhance the overall curb appeal of your property. A well-chosen roof can complement the architectural style of your home, creating a harmonious exterior appearance that is both appealing and eye-catching.
Average Cost of Roof Shingle Repair
There are two main factors that determine the repair cost: the material of the shingles and the size of the repair area.
Asphalt shingles are one of the most common roofing materials due to their cost-effectiveness and durability.
On average, the cost to repair asphalt shingles runs around $3 to $9 per square foot. This means for a 10 by 10 foot area, homeowners might expect to pay anywhere from $300 to $900.
This price typically includes the cost of labor and materials. However, the price could vary based on the complexity of the job and regional labor costs.
On the other hand, wood shingles, while aesthetically pleasing, can be more expensive to repair. The average cost for repairing wood shingles can range from $4 to $10 per square foot.
Again, this price can fluctuate depending on the size of the repair, the specific type of wood used, and local labor rates. It is important to note that while wood shingles may be more expensive upfront, their natural insulation properties can provide long-term cost savings on energy bills.
Tile shingles are another option that homeowners might consider. Known for their durability and longevity, the cost to repair tile shingles can range from $7 to $15 per square foot. The higher price reflects the cost of the materials and the specialized labor involved. Despite the higher upfront costs, tile shingles can last for decades if properly maintained, making them a worthwhile investment for many homeowners.
Lastly, slate shingles are among the more premium options when it comes to roofing materials. They offer a distinctive and timeless look but come with a higher price tag. The cost to repair slate shingles can range from $10 to $25 per square foot. While this may seem steep, the longevity and durability of slate shingles can often offset the initial investment over the years.

